Load Balancing Exchange ActiveSync with Client Certificates
We were setting up a NetScaler to load balance the Exchange 2013 CAS protocols a few weeks ago and we had an interesting dilemma. The client had mandated the use of Certificate-Based Authentication (CBA) when accessing Exchange ActiveSync from mobile devices and wanted to leverage their NetScaler appliances to provide high availability for their Exchange Server environment.
In this post we will look at the best way to load balance Exchange ActiveSync when Certificate-Based Authentication required.
How Load Balancing Works for Exchange Server
For those of you who are not familiar with the concepts behind load balancing for Exchange Server, here is a brief overview:
- Exchange has an internal component called Health Manager that is constantly monitoring health of the Exchange components.
- These components compile the output of the Get-ServerHealth and Get-ServerComponentState cmdlets in Exchange.
- Health Manager uses “responders” to perform actions when a component transitions between Active or Inactive states.
- The state of monitored components are used by Exchange to make operational decisions – such as deciding which DAG member to take over the Active database role for a mailbox database, or knowing if a server is capable of delivering the Offline Address Book.
- Each of the Client Access protocols have an IIS virtual directory which acts as a gateway into the Exchange environment. These websites are accessed by software clients such as Outlook, web users of Outlook Web App and mobile devices accessing Exchange ActiveSync.
- When a protocol is marked as Active, Health Manager publishes a file in the virtual directory for the protocol called “healthcheck.htm”. This page can be polled by load balancers and monitoring systems to see if the service is healthy.
- When a protocol is marked as Inactive, the service stops publishing the “healthcheck.htm” file in the virtual directory. This results in a “Page cannot be found” error (or HTTP 404 code).
We will configure our load balancer monitors as below:
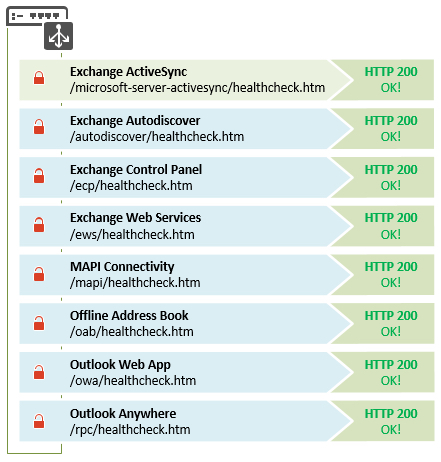
Note: The Exchange ActiveSync monitor has a closed padlock next to it – we will explain that later!
Certificate-Based Authentication for Exchange ActiveSync
Security conscious organisations generally use client certificates to authenticate mobile devices to their Exchange environments. Certificate-Based Authentication (CBA), as the name suggests, is an authentication mechanism where clients authenticate to services using SSL certificates. The certificates are issued by an internal public key infrastructure usually located on the same domain as the Exchange Server infrastructure.
The mechanism benefits both IT departments and users as they do not need to manage credentials on mobile devices where certificates are being used. This effectively removes authentication from almost all troubleshooting situations.
You can read up on how to enable client certificates for Exchange ActiveSync in a blog post by The Exchange Team here. The post refers to Exchange 2010 but at the time of writing it is also valid for Exchange Server 2013 and 2016.
Certificate-Based Authentication and Load Balancing
There are many opinions on the best way to load balance certificate-based authentication, including :-
- Pass the Certificate with HTTP Headers: Setup the NetScaler do CBA and then pass on the client certificate to the backend server using HTTP headers.
- Use Authentication Delegation: Setup the NetScaler do CBA and then authenticate to the backend server with delegation (such as Kerberos Constrained Delegation).
- Use SSL Bridging: Setup the load balancer pass the traffic directly to the backend server directly using the SSL_BRIDGE load balancer protocol type.
Choosing the best method of load balancing CBA really depends on the backend application.
Passing the certificate with HTTP headers involves setting up an SSL Policy that extracts the client certificate information into HTTP headers which are sent to the back-end application. The problem with this solution is that the application needs to know to read the data from the headers. This method is not the same as CBA – it is transitioning to an alternative authentication mechanism. This effectively moves the authentication mechanism into the HTTP protocol instead of using SSL protocols. In most cases this solution means development on the back-end application for this mechanism – something we obviously don’t have with Exchange ActiveSync.
The second option is to use Kerberos-Constrained Delegation (KCD). In this scenario the user authenticates directly to the NetScaler with their client certificate. The NetScaler is delegated permission to authenticate the user against other domain members using Kerberos. A guide by Rafyel Brooks details how to do this – but I wouldn’t recommend taking this approach for three reasons. Firstly, Kerberos Constrained Delegation is a complicated process to setup correctly. Secondly, Kerberos and Exchange ActiveSync is a really grey area and I’m unsure if KCD is even supported for use with Exchange ActiveSync. The only guidance available from Microsoft concerns setting up Kerberos authentication for Outlook access (a VERY different subject). Thirdly, there is a much simpler way to solve our problem using option #3 as discussed below.
SSL Bridging is the final option, leaving the certification flow as designed by passing the SSL traffic directly through to Exchange. There are many threads discussing Certificate Based Authentication that end with this recommendation. It is a simple solution that relies on few moving parts rather than the overly complex solutions in option #1 and #2. Using SSL_BRIDGE has its own caveats however, mainly that we cannot load balance bridged traffic at layer 7 and we will need a dedicated IP addresses for the load balancer vServer.
Let’s look at some common SSL load balancing scenarios:

In a typical SSL vServer configuration the NetScaler behaviour is as below:
- A client initiates a connection to the NetScaler.
- The NetScaler will terminate the SSL connection and inspect the traffic for inspection and decides where to send the traffic. This decision is based on a multitude of factors – the most common being whether or not the backend service is available and healthy.
- The NetScaler will forward the client request to the backend server using a new SSL-encrypted HTTP session.
- When the backend server answers, the NetScaler sends the traffic back to the client.
With SSL load balancing in place, the NetScaler can compress, redirect and accelerate HTTP traffic to optimise the user experience.

In a typical SSL vServer configuration the NetScaler behaviour is as below:
- A client initiates a connection to the NetScaler.
- The NetScaler will terminate the SSL connection and inspect the traffic for inspection and decides where to send the traffic. This decision is based on a multitude of factors – the most common being whether or not the backend service is available and healthy.
- The NetScaler will forward the client request to the backend server using a new unencrypted HTTP session.
- When the backend server answers, the NetScaler sends the traffic back to the client.
With SSL Offloaded by the NetScaler, the backend server is saved CPU intensive operations required to process SSL handshakes and encryption. This is a common configuration for websites with large amounts of traffic and can alleviate a LOT of stress from web servers.

In a typical SSL_BRIDGE vServer configuration the NetScaler behaviour is as below:
- A client initiates a connection to the NetScaler.
- The NetScaler does not terminate the SSL connection, but still decides where to send the traffic.
- The NetScaler forwards the original client request to the backend server.
- When the backend server answers, the packets are forwarded onto the client.
With SSL Bridging in place, the NetScaler has no visibility over the request nor can it perform any layer-7 load balancing. The packets are sent directly onto the backend server for processing.
Monitoring with SSL Bridging
Using SSL Bridging brings us a new problem however – specifically a problem monitoring the backend server. Load balancers rely on monitors to determine if a backend server is healthy and available for traffic. We don’t want clients requests going to a server that is having problems or worse – offline!
Most of the time we would use PING, TCP or HTTP monitors to poll a backend server for health. A simple example of this would be to have a HTTP monitor poll a web server. If the web server responds it will reply with a HTTP 200 code. If the page is missing or cannot be found, the web server will respond with a HTTP 404 code. Simple enough, but in our case the ActiveSync healthcheck.htm page is sitting inside the virtual directory protected with CBA – meaning we need to authenticate to check the monitor.
There is a LOT of things you can do with SSL on NetScaler appliances – especially when it comes to load balancing SSL traffic. You can specify options such as the protocols that are, or are not allowed, what cipher suites are available for encryption, SSL re-negotiation and much more. You can also supply a client certificate that is used by the load balancer for monitoring and delivering backend applications. Unfortunately none of these options are not available when using SSL_BRIDGE as a load balancing protocol as the netscaler isn’t evaluating the data stream, it’s just acting as a broker and forwarding it on.
So how do we solve our problem? Well, we have a few options:
- Use an alternative monitor (such as PING or TCP): These monitors will certainly work for us, but they are not accurately reflecting server health. These monitors state evaluation translates to “The server is up, and something is listening on TCP/443”.
- Report based on the status of another client access protocol (such as Outlook Web App): This improves on the accuracy of the above method, as it will confirm that Exchange is responding to IIS requests. This approach uses the logical assumption of “If OWA is down, then ActiveSync will likely be down also”. Not entirely ideal, but still better than PING or TCP.
- Use a custom monitor to check the backend server using a client certificate: This approach will give us the best of both worlds! We can check the health of the ActiveSync service as desired using a client certificate, but also leave client traffic alone.
The problem with the above option is nothing pre-built exists so as you can imagine, I went for the third option anyway and wrote my own monitor.
Introducing the NetScaler USER Monitor for Certificate-Based Authentication!
This user monitor uses cURL to poll a web server with a supplied client certificate. Script parameters include:
- The URL path: This is the part after the host portion of a URL (for example: /owa/test.htm)
- The Client Certificate file: The file on the NetScaler that contains the client certificate public key.
- The Client Certificate Key file: The file on the NetScaler that contains the client certificate private key.
- The HTTP Success Code: This is most commonly 200.
Usage:
add lb mon mon-exch-activesync USER -scriptName ns_http_cbauth_probe_v1.0.pl -scriptArgs "/Microsoft-Server-ActiveSync/healthcheck.htm;svc-netscaler.crt;svc-netscaler.key;200;"
Download the script HERE.
WARNING: This script has been tested in my lab environment, however you should always test in a non-production environment prior to use in production.
How to Setup the Monitor for Certificate-Based Authentication
Before we get started, there are some things we will need:
- A full backup before you do anything! You should be doing this anyway 🙂
- A certificate and private key for the NetScaler appliance to use in PEM format. This can be a monitoring service account or a dedicated account for NetScaler. The certificate must have “Client Authentication” usage available.
- Access to the NetScaler GUI to perform the changes we need.
With all of that ready let’s get started!
Installing the Client Certificate for the NetScaler

We need to export a client certificate to PFX that will be used in our configuration. If you already have a PFX prepared, move onto the next section.
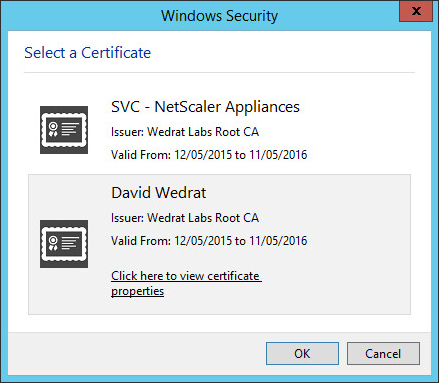
- Open MMC and load the certificates snap-in.
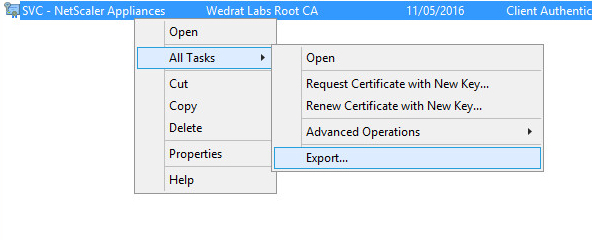
- Right-click the certificate and select All Tasks > Export

- Click Next

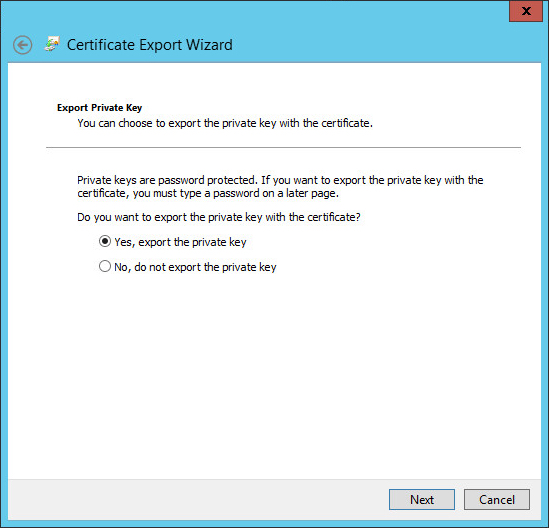
- Choose Yes, export the private key and then click Next
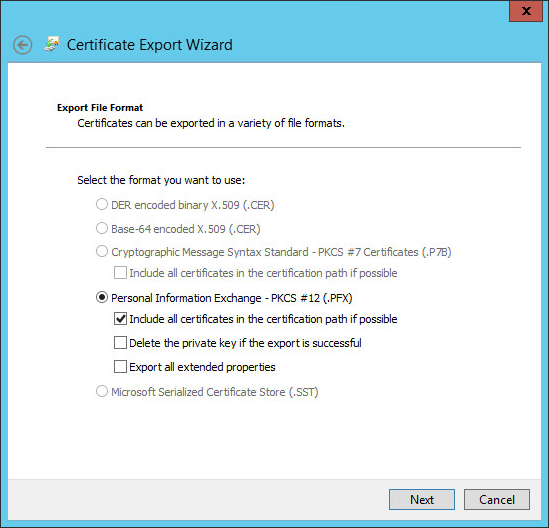
- Choose Include all certificates in the certification path if possible and then click Next
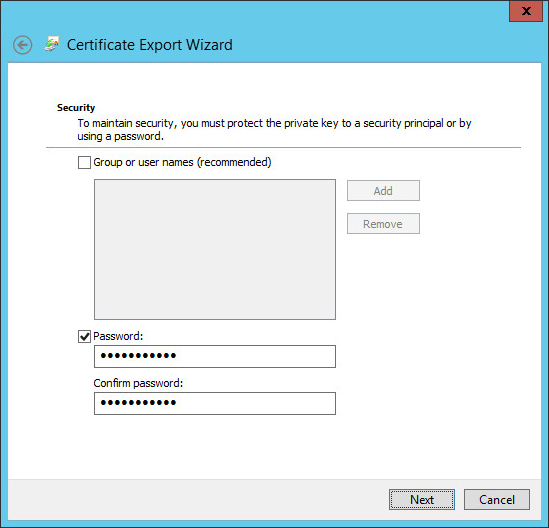
- Enter a password that will be later used as the Import Password on the NetScaler and then click Next
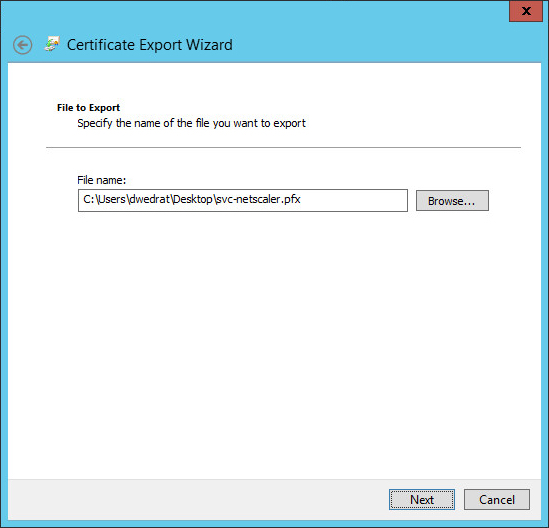
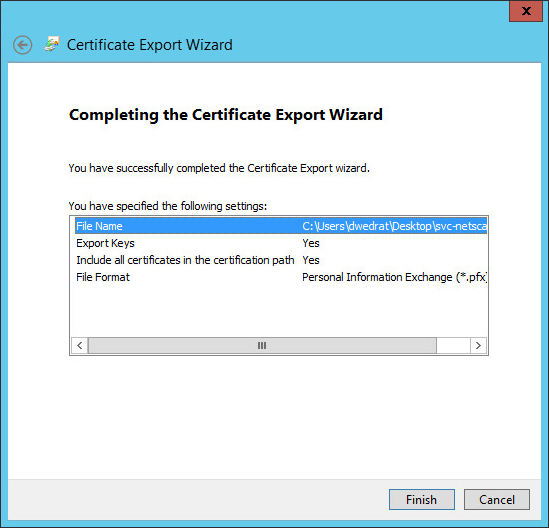
- Choose a file name and then click Next
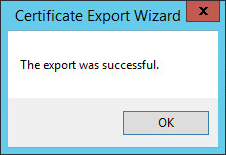
- Click Finish to confirm the settings and export the PFX file
- Click OK to close the message

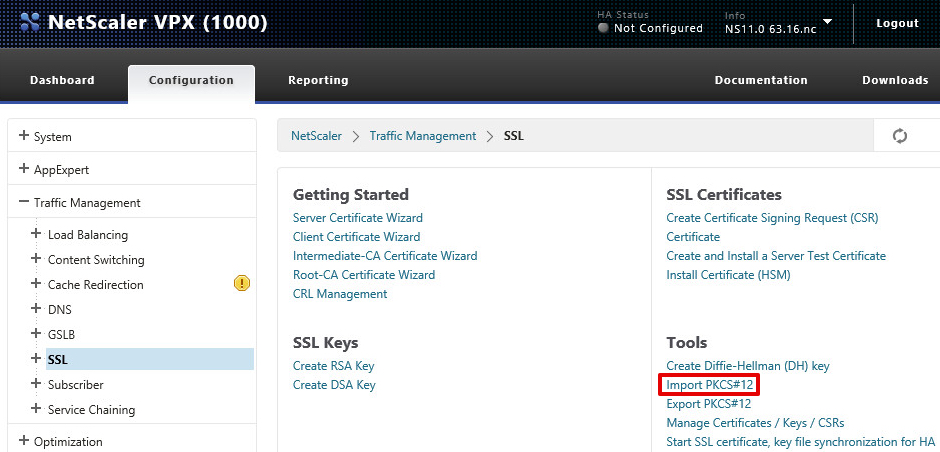
- Login to the NetScaler appliance
- Navigate to Configuration > Traffic Management > SSL and then click the Import PKCS#12 link

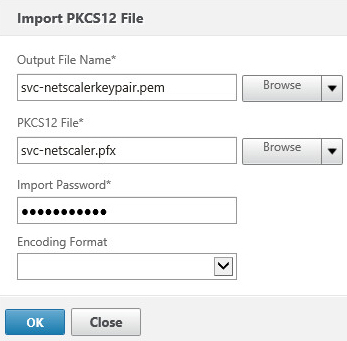
- In the Output File Name field, enter a name to for the converted PEM file
Click the Browse button next to the PCS12 File field and choose the exported PFX file
Type the password specified during the export of the PFX file into the Import Password field
Click OK to import and convert the certificate key pair

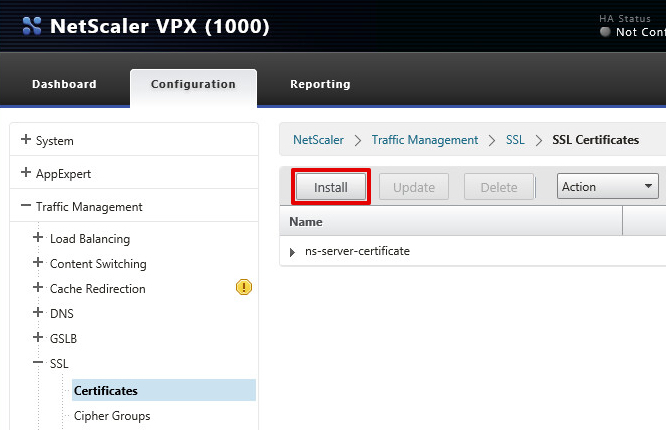
- Navigate to Configuration > Traffic Management > SSL and then click the Install button

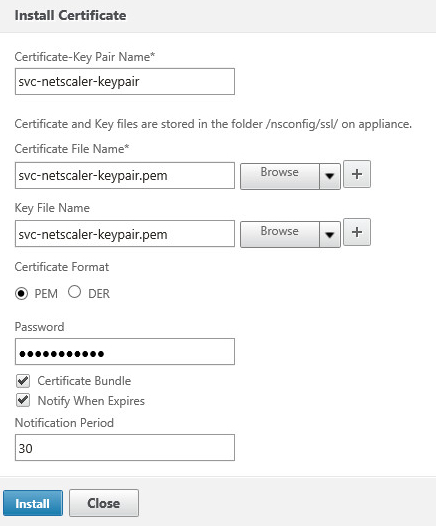
- In the Certificate-Key Pair Name field give the certificate a name
For both the Certificate File Name and Key File Name fields, browse to the PEM file we specified during the import earlier
Tick the Certificate Bundle box. This will import and link any certificates included in the chain by the PFX file
Click the Install button

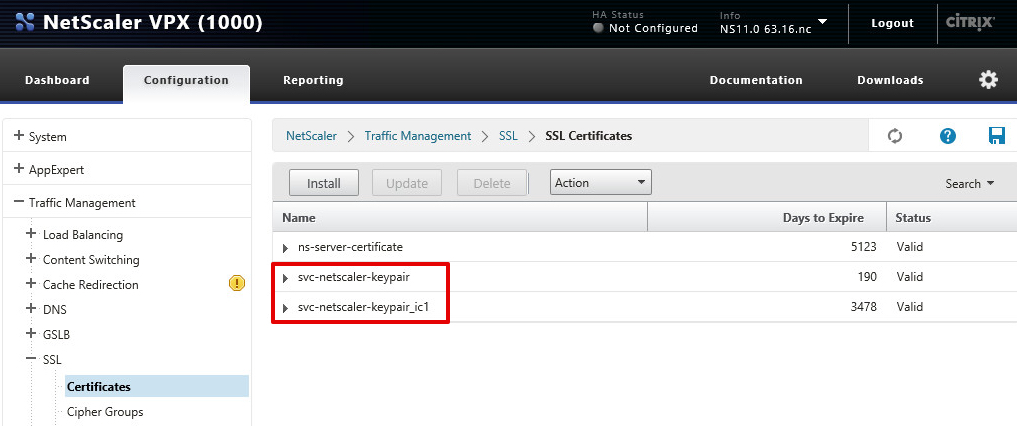
- If everything went well you see the imported certificate and an intermediate certificates as above.
Note: In my example above you can see the certificate, and a linked certificate (suffixed with _ic1).


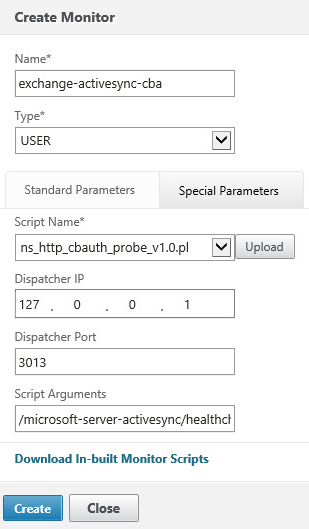
Installing the USER Monitor Script
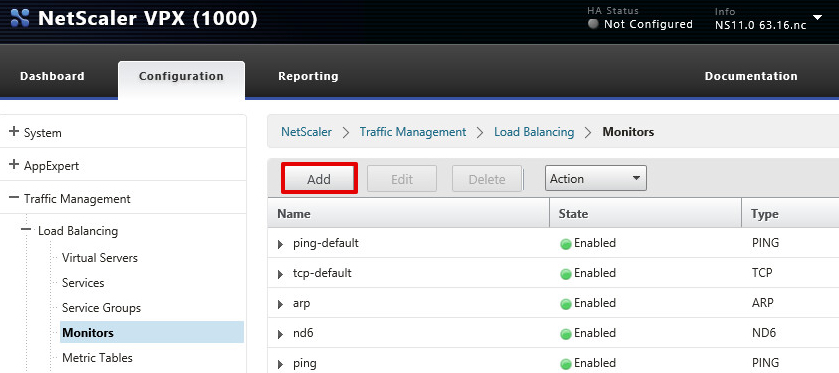
- Login to the NetScaler appliance
- Navigate to Configuration > Traffic Management > Load Balancing > Monitors and then click the Add button.

- Name the new monitor and select the type USER.
On the Special Parameters tab click the Upload button and the choose the script file
Ensure the Dispatcher IP is 127.0.0.1
Ensure the Dispatcher Port is 3012
In the script arguments field, enter the values relevant to your installation as below:
/microsoft-server-activesync/healthcheck.htm;netscalerclient.crt;netscalerclient.key;200;Click Create to save the monitor

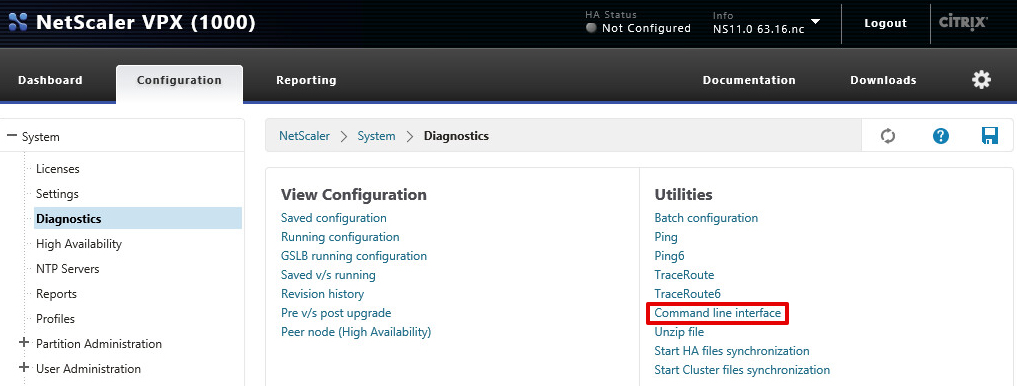
- Navigate to Configuration > System > Diagnostics and then click the Command Line Interface line

- Enter the following commands in sequence, clicking the Go button between each command:
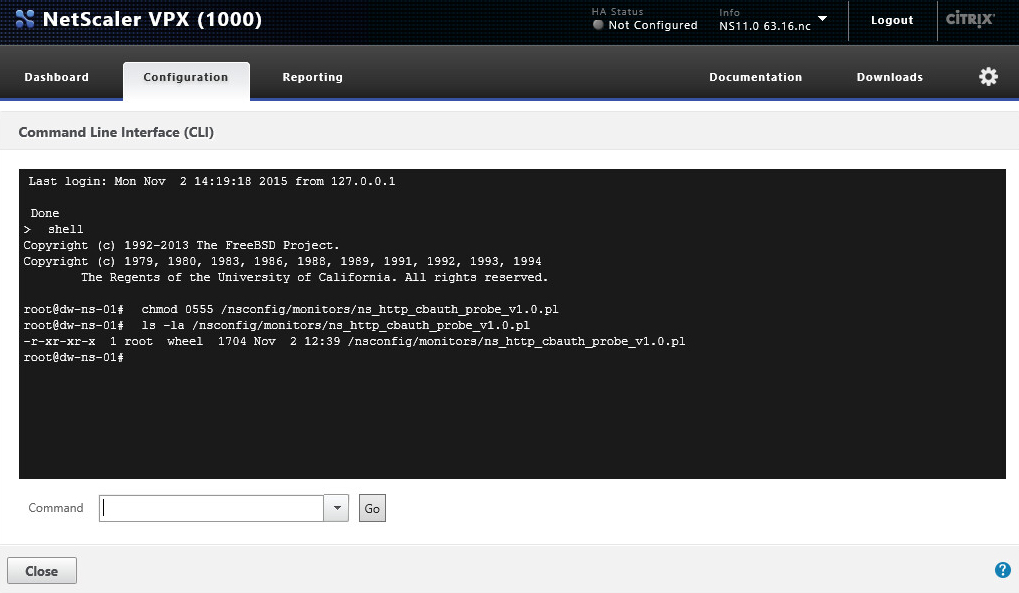
shell
chmod 0555 /nsconfig/monitors/ns_http_cbauth_probe_v1.0.pl
ls -la /nsconfig/monitors/ns_http_cbauth_probe_v1.0.pl

Setting up Load Balancing
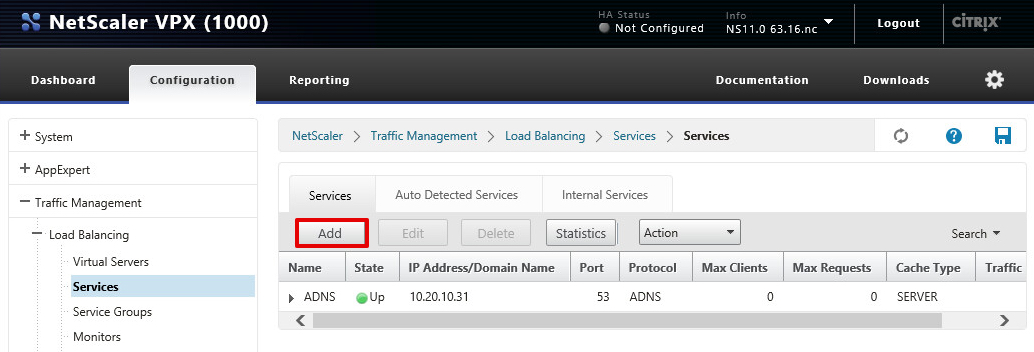
- Login to the NetScaler appliance
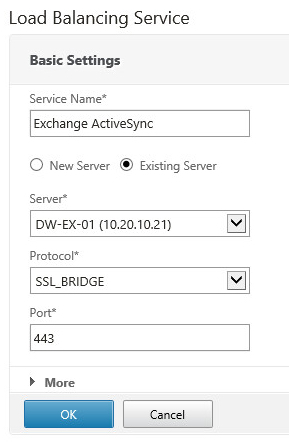
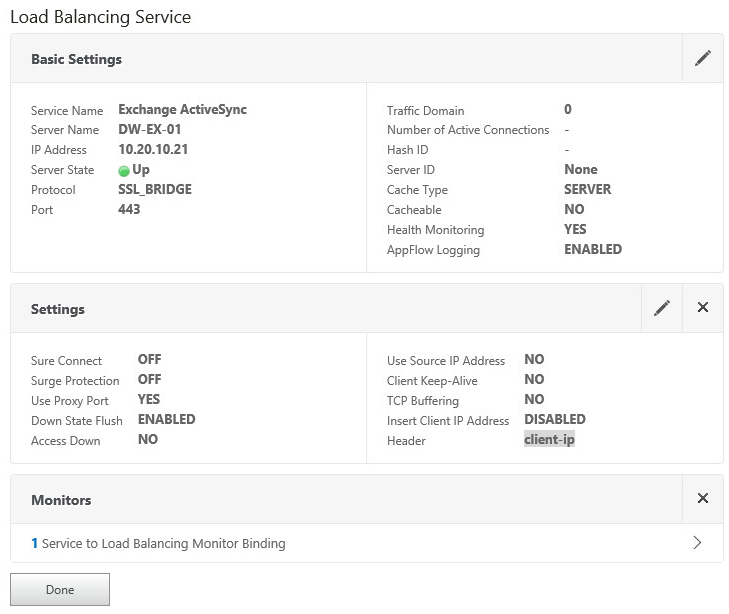
- Navigate to Configuration > Traffic Management > Load Balancing > Services and then click the Add button

- Name the service and specify the protocol as SSL_BRIDGE

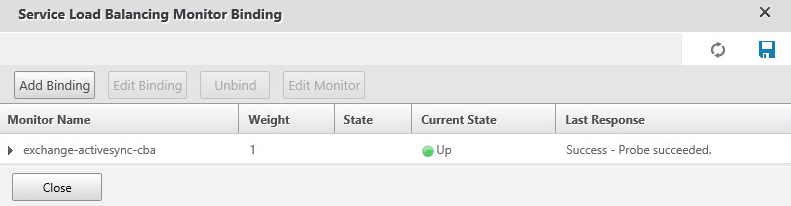
- Bind the custom monitor we created earlier to the service

- Click Done to save the service

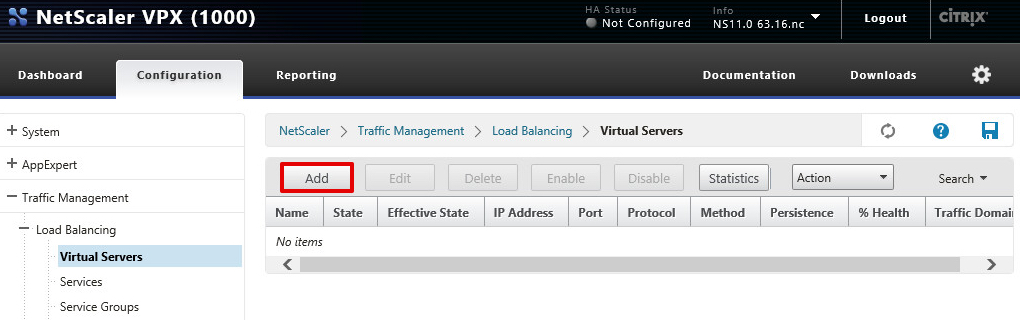
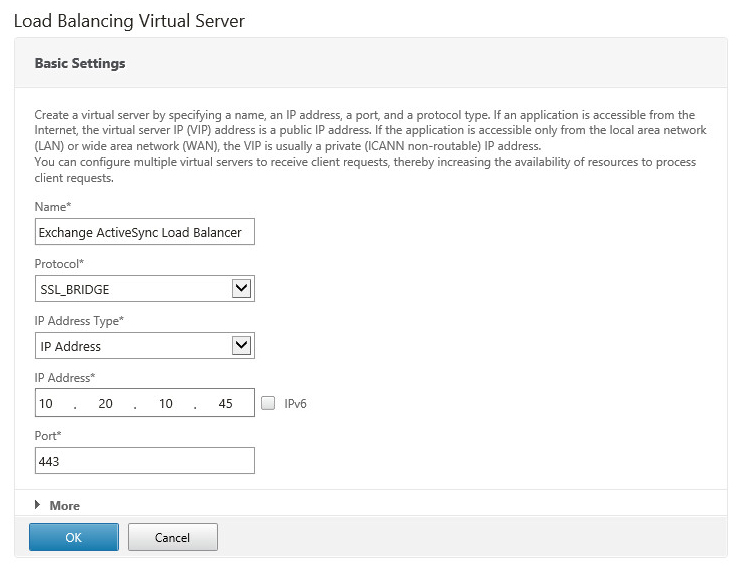
- Navigate to Configuration > Traffic Management > Load Balancing > Virtual Servers and then click the Add button

- Name the Virtual Server
Select the protocol SSL_BRIDGE
Specify an IP Address for the NetScaler to listen on
Specify the Port for the NetScaler to listen on
Click OK

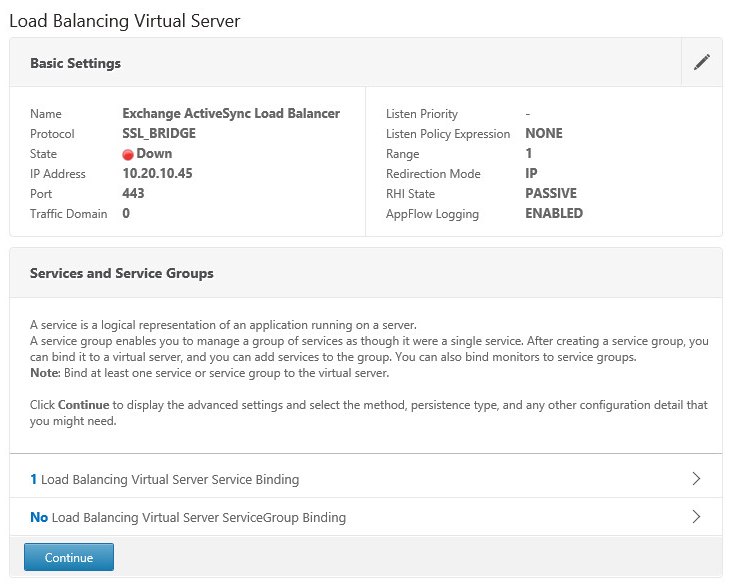
- Bind the Service we created earlier and then click Continue

- Click Done to save the load balancer virtual server

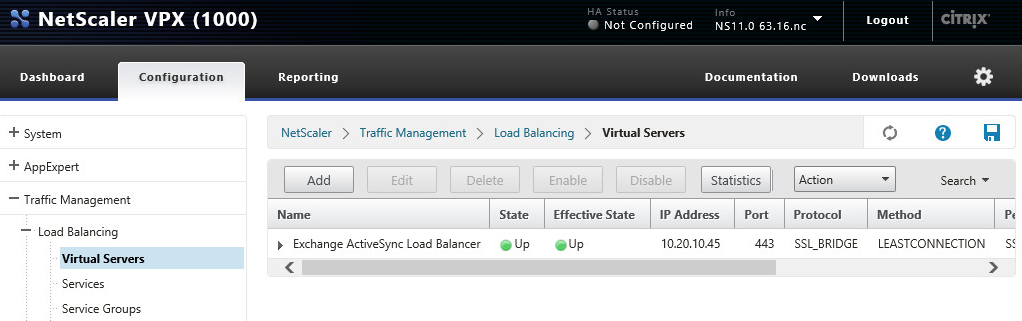
- We now have our load balancer virtual server setup and ready to go!


Testing That it Works
Now that we are done with our setup let’s test it!
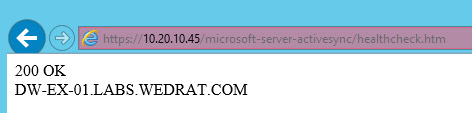
- Open a browser and navigate to https://<loadbalancer-ip>/microsoft-server-activesync/healthcheck.htm

- You will be asked to authenticate using a client certificate (as we expect)

- You will then see a page with 200 OK and the server name as shown in the example below!